

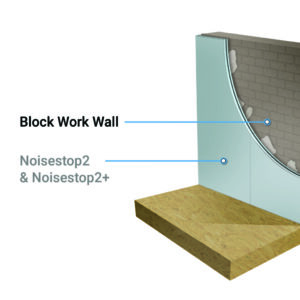
Installation of Noisestop 2 & 2+ Panels
- Tools required: Tape measure, straight edge, Stanley knife, hand saw.
- Fixings: If you fix stud or ceiling joists, you will need drywall or universal screws. Plasterboard adhesive to bond the panels directly onto walls. AC50 acoustic sealant for the edges of the boards.
Before you begin fitting the panels
Always check the surface you will apply the boards to and ensure there are no holes, cracks or blown plaster. The surface you are applying to the boards should be in good condition. Fill and repair any obvious areas before you start.
Remove all decorative features and electrical points before the installation. Once the work is completed, these can be reinstated.
Ready to start fitting the panels
Before you begin installing the boards, work out where you are going to start. Ensure that you are not left with a cut at the end of less than 30cm. Once you have worked out where to begin, you can start fitting the panels.
Installing the panels with plasterboard adhesive
When you fit these panels with plasterboard adhesive, ensure the surface you are bonding them to be in good condition. Any faults or defects in the surface should be made good before you start fitting the panels.
Plasterboard adhesive will need to be mixed before the installation. Full instructions on how to mix the adhesive with water are on the bags of adhesive. We recommend using one bag of adhesive for every five boards.
The panels are bonded to the wall by using the ‘dot and dab’ method. Apply fist-sized amounts of adhesive to the wall and then push the panel’s back onto the adhesive. Apply approximately 9-12 dots should be per board. Use a level to ensure the panels are straight.
You should only use this method on surfaces that are flat and in good condition. You can not apply these panels to ceilings using adhesives.
Installing the panels with screws
Fitting panels onto brick walls can be fitted directly onto brick walls using screws and plugs. You will need 9 fixing in total; holes will have to be drilled for the plugs and screws. You can use hammer fixing for this type of installation method or brown wall plugs and universal screws.
Fitting panels onto a stud frame, ceiling joist or soundbreaker bars – If you fix the panels onto this type of construction, you can use drywall screws or universal screws.
There is no need to pre-drill the panels with this type of fitting method. You should screw straight through the board into the framework behind the board. If you are fixing into soundbreaker bars, the panels are fixed into the wide corrugated section of the bar.
When you screw the panels into the stud frame or bar, try not to over tighten them. The head of the screw should be flush with the surface of the plasterboard face. This will reduce the chance of the fixings ‘popping’. The screw goes too deep and does not hold the panel properly, causing movement along the edge of the panels.
Cutting soundproof panels
You will need to cut the boards to fit the shape of your room. When you cut the boards, you can use a Stanley knife, hand saw, jigsaw or circular saw.
Measure the size of the cut and then mark the board; you should only have to cut the panels that adjoin a return wall or the ceiling. If you leave a small gap, approximately 3-5mm, around the perimeter, you should use acoustic sealant to fill around the perimeter.
Use acoustic sealant along the edges of the boards
As you fit the panels, you should butt them together as close as you can. Leave a small 3-5mm gap can be left around the perimeter of the boards to allow for acoustic sealant
As you fit the panels, you should run a bead of sealant along the edge of the first panel. Push the next panel up to the first and then repeat the process, applying a small bead of sealant between each panel as you install them.
Check the edge of each board at the end of the installation to ensure they are completely sealed. Apply extra sealant to any areas that have not been filled with the acoustic sealant. Always wipe away excess acoustic sealant from the panels.
Reinstating electrical points
During and after the installation of the panels, you will have to consider reinstating electrical points. Sockets and lighting points can be fitted after the panels have been installed. The electrical cable will have to be extended, depending on the depth of soundproofing you are fitting.
Cut or drill a small hole to allow the electrical cable to be passed through the board. If you fit plug outlets, you should consider surface mounting the back boxes. This will mean reducing the panel that has to be cut away when fitting recessed back boxes.
Ensure any holes that have been made are sealed at the end of the installation with acoustic sealant.
Finishing off
Once you have installed all the panels, you can now finish the installation. All soundproof boards in the Noisestop range have an acoustic plasterboard face with a tapered edge. This allows you to finish the installation in several different ways.
The two main finishing methods are to either plaster the panels or tape and fill the tapered edge. From an acoustic point of view, you can use either method. It will not make a difference to the level of soundproofing. Replace skirting and coving if required and decorate.
Related Products
-

Noisestop 2 Panel 28mm x 1200mm x 1200mm
From £ 32.45 ex. VAT -
-
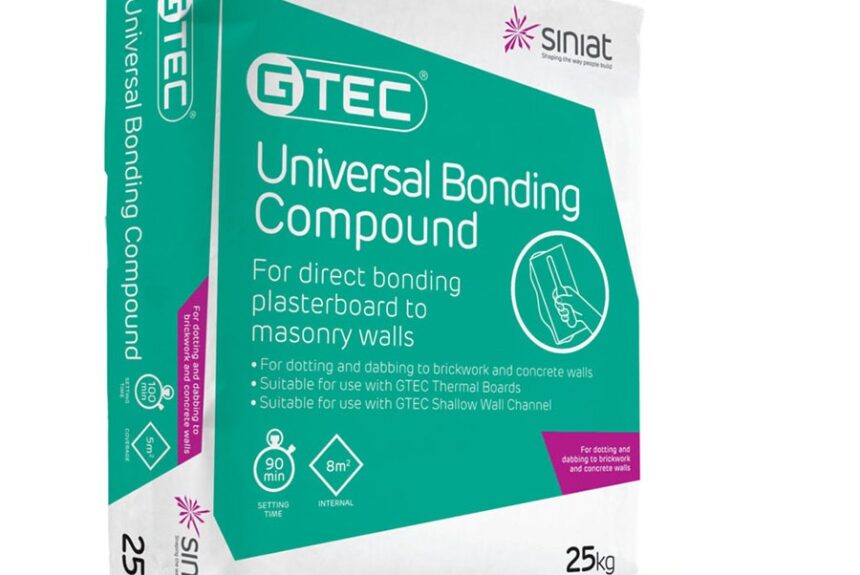
Plasterboard Adhesive 25kg Bag
From £ 10.45 ex. VAT -

AC50 Acoustic Sealant 380ml & 900ml
From £ 3.95 ex. VAT
For enquiries, please call 01423 339163, or send us a message via our contacts page. FREE Nationwide delivery on orders over £750 ex.VAT