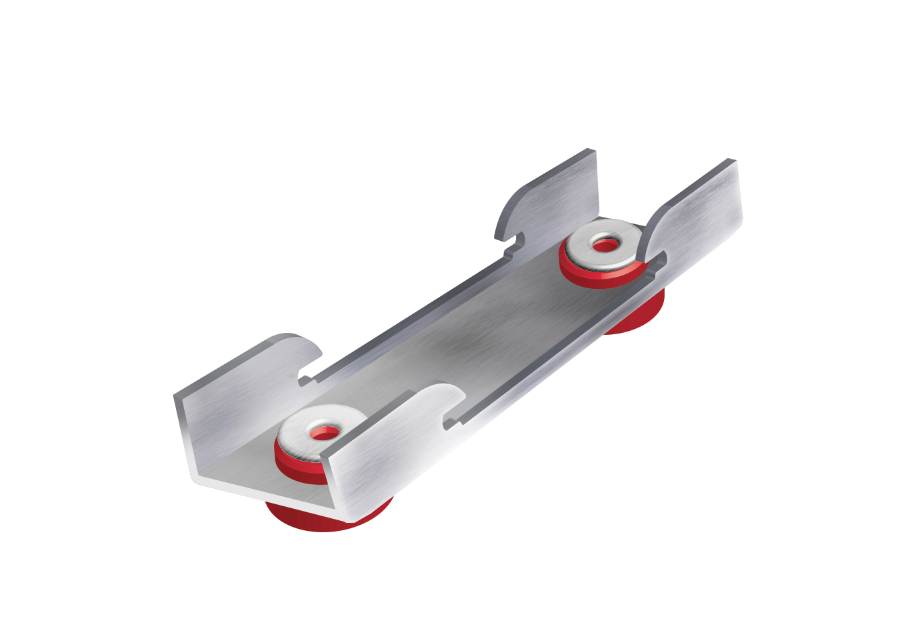
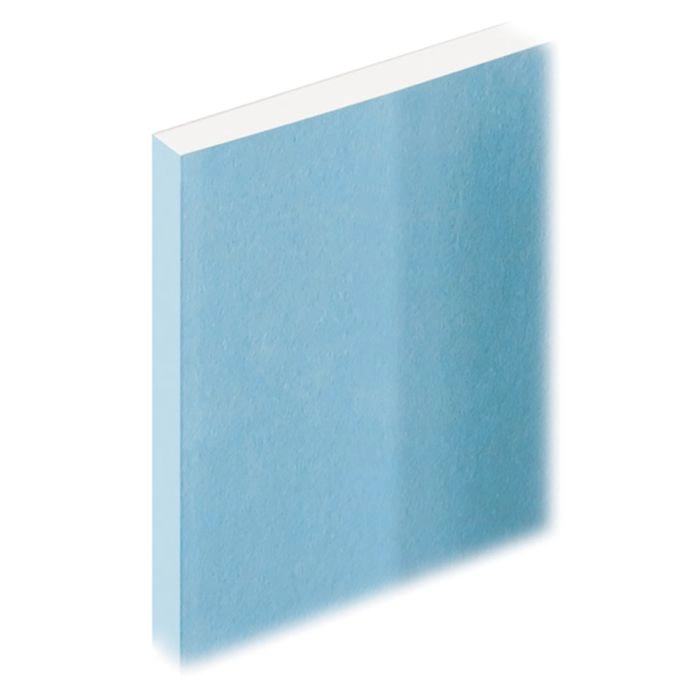
AcoustiClip – Sound Isolation Clip
£4.95 ex. VAT
In stock, ready to ship
Estimated Delivery: 3 - 5 Days
(30th Jul - 1st Aug)
Use the AcoustiClip sound isolation system to significantly reduce sound transfer through walls and ceilings. Apply the AcoustiClip directly to a partition wall, stud frames, concrete ceiling joists, or timber ceiling joists to decouple the structure from the rest of the building.
Decouple and isolate the ceiling and walls to reduce vibration that transfers sounds between rooms by applying the AcoustiClip directly to the wall or ceiling or onto stud frames and ceiling joists.
The AcoustiClip is the best solution for noisy neighbours, recording studios, cinema rooms, and other spaces that require the highest soundproofing level.
AcoustiClip Soundproofing Systems
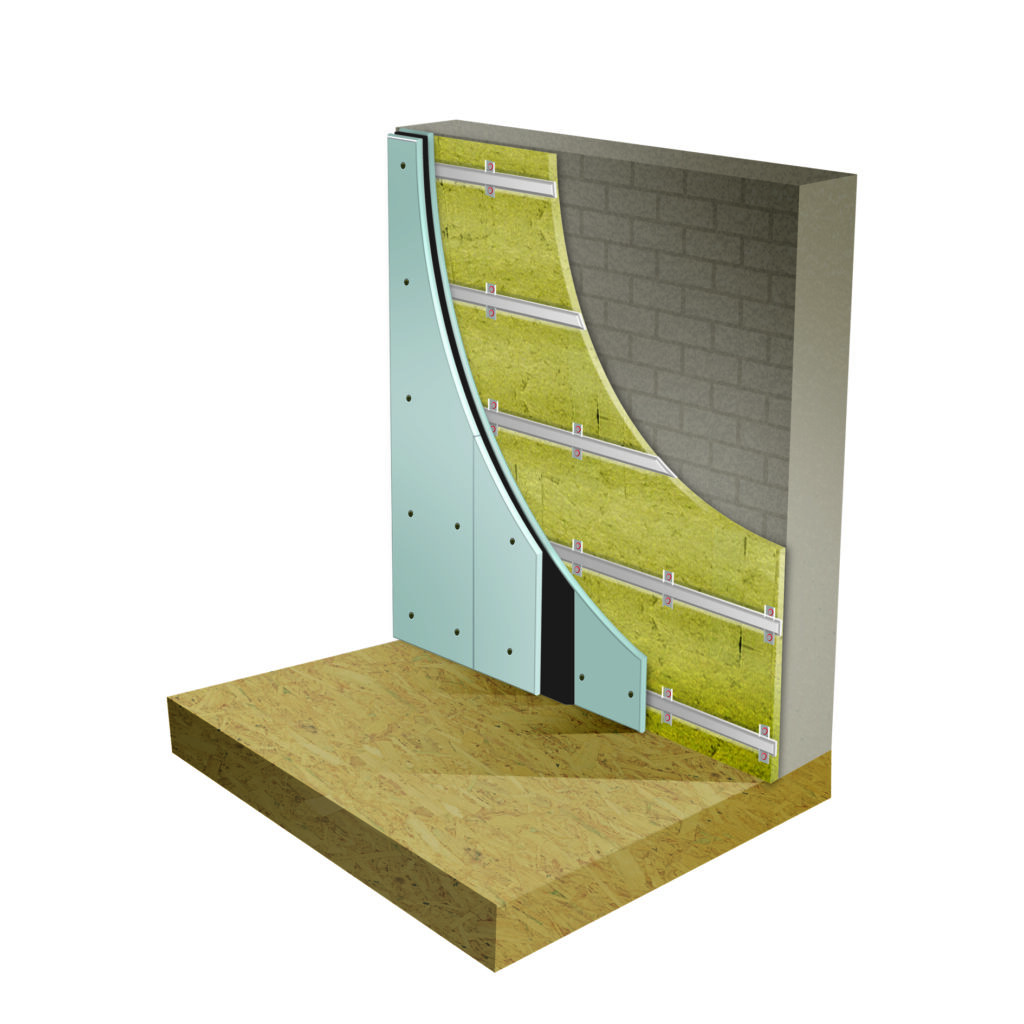
AcoustiClip Direct to Wall System The best slimline solution for soundproofing against noisy neighbours without compromising living space.
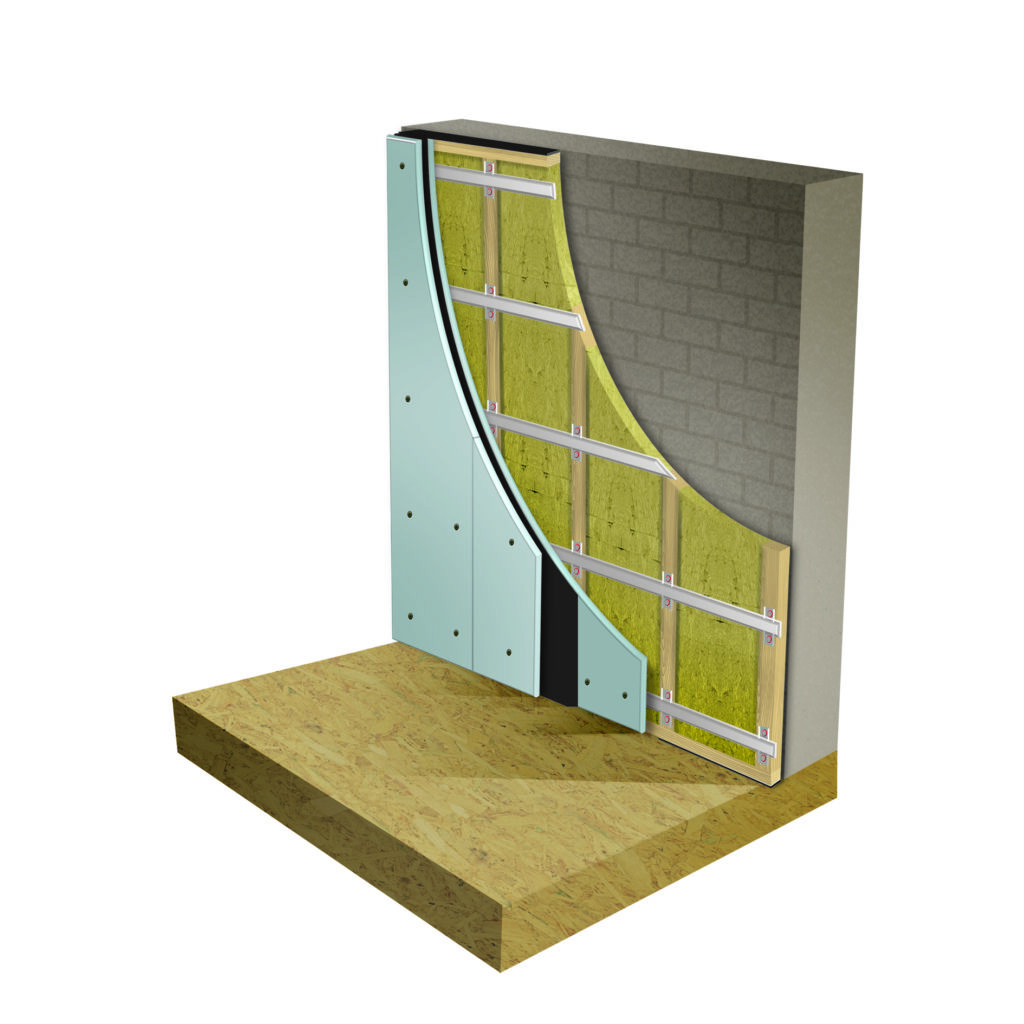
AoustiClip Stud Wall System Soundproof internal stud walls or create an isolated stud wall against a party wall for the highest soundproofing levels.
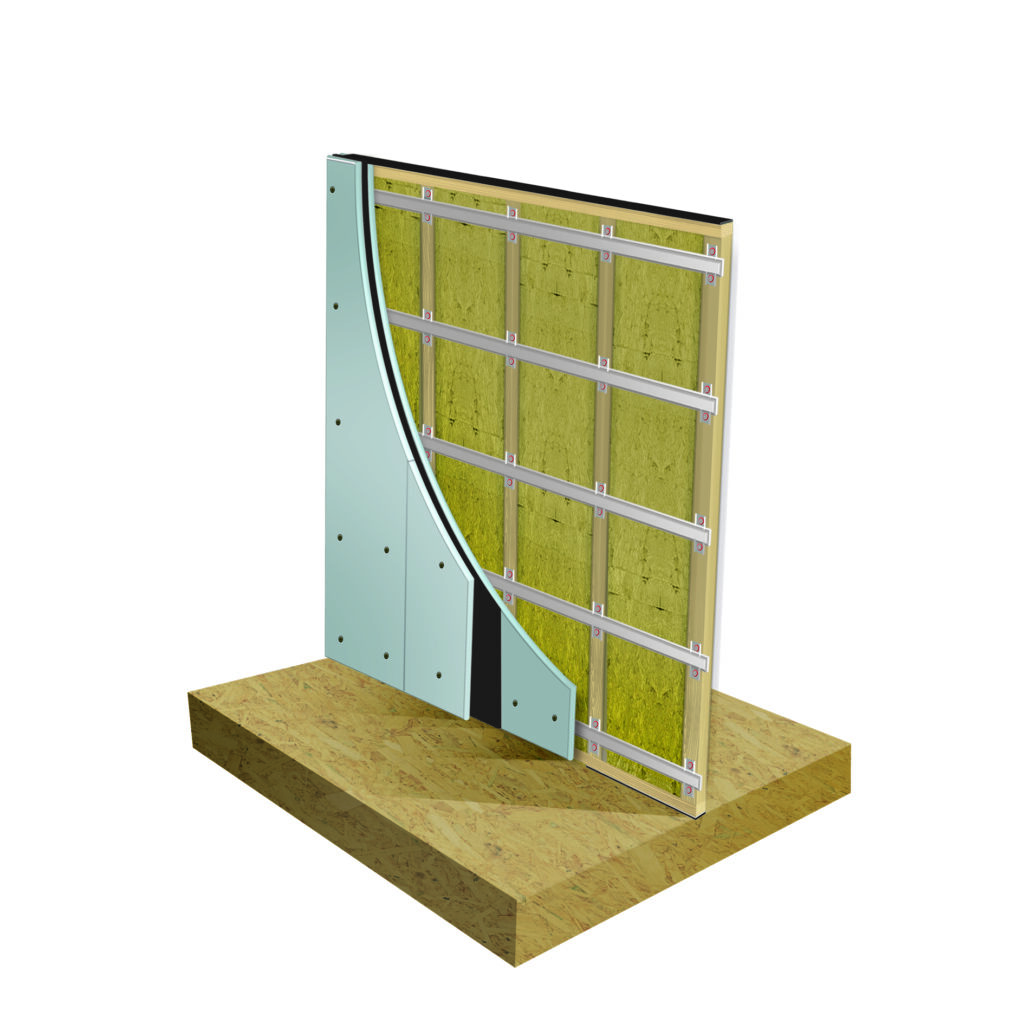
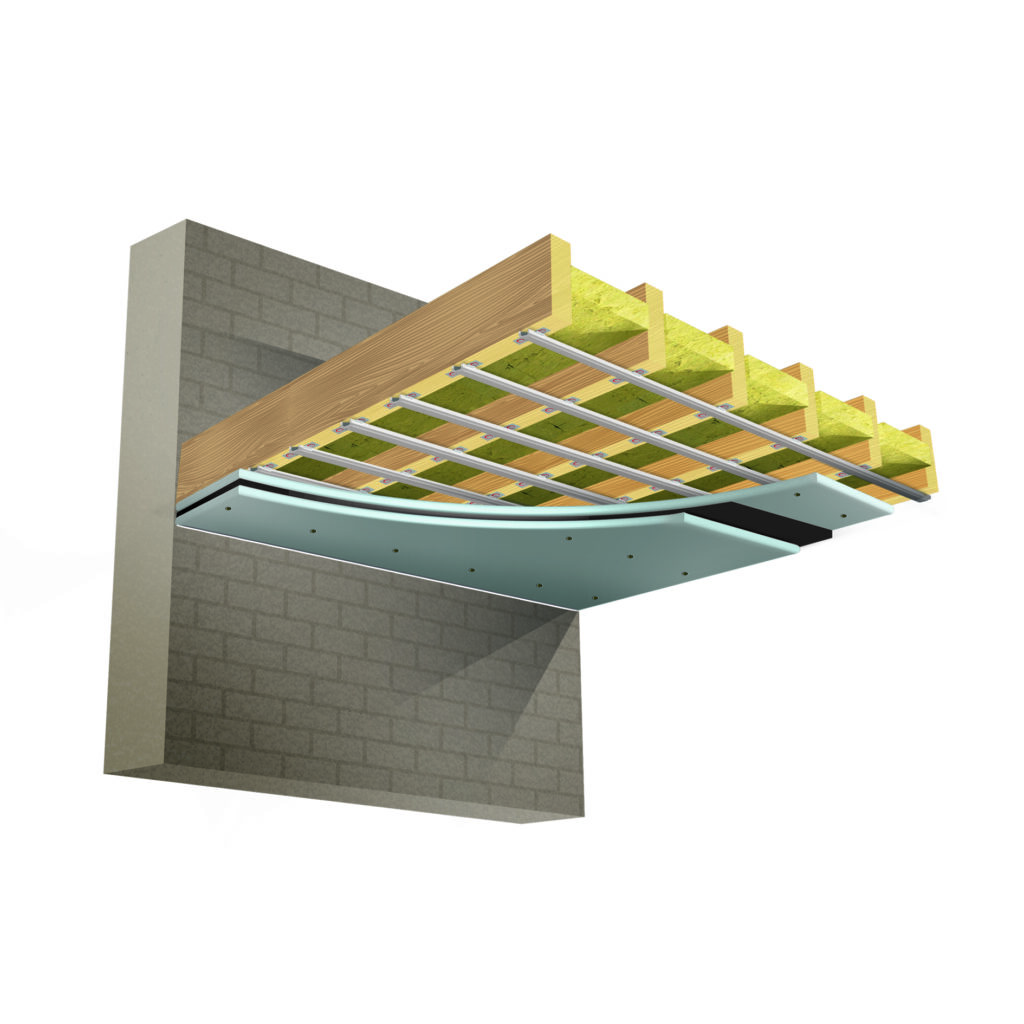
AcoustiClip Timber Joist Ceiling System Soundproof timber joist ceilings to reduce footfall and airborne sounds.
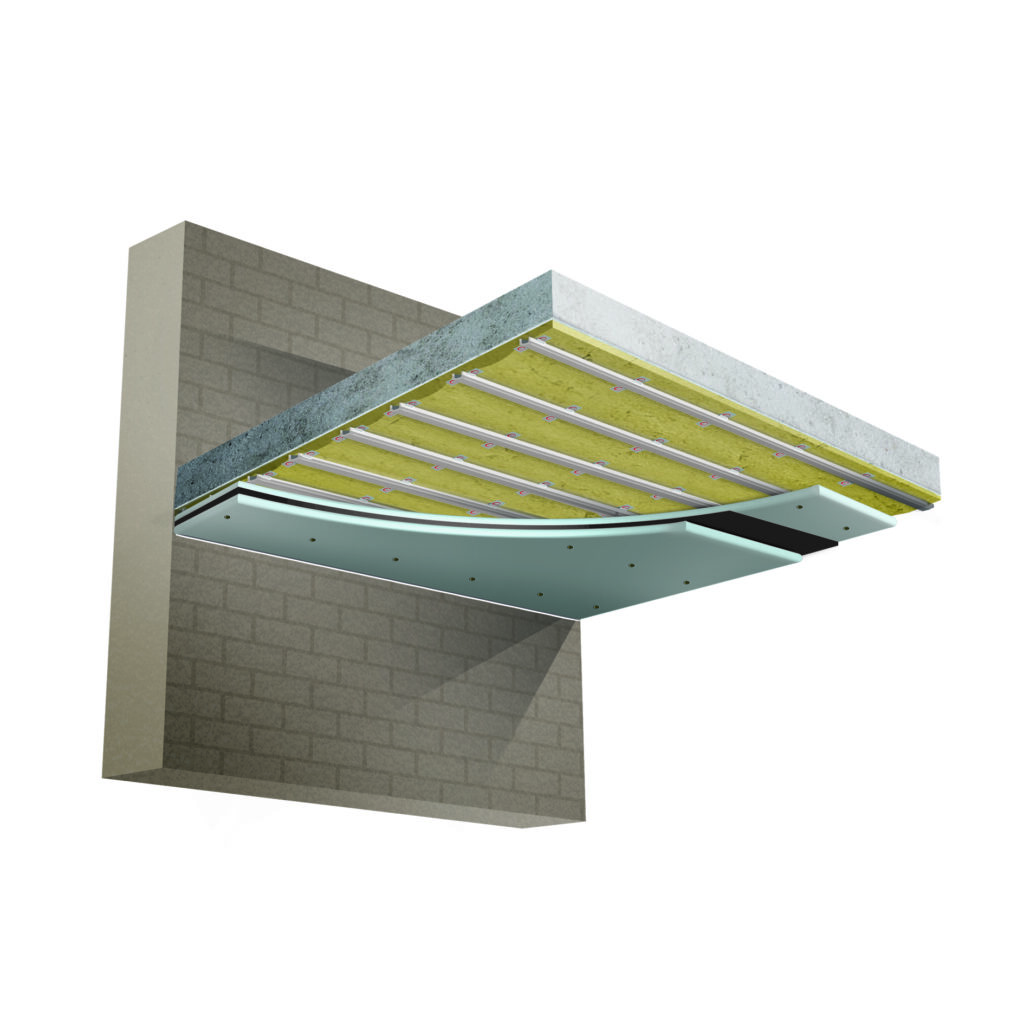
AcoustiClip Concrete Ceiling System Soundproof concrete ceilings to reduce impact sounds and improve airborne noise reduction.
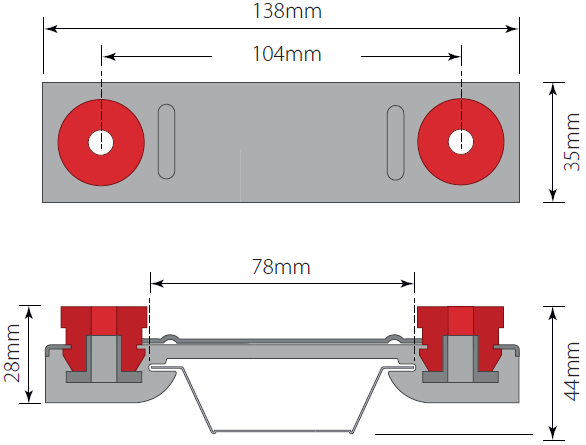
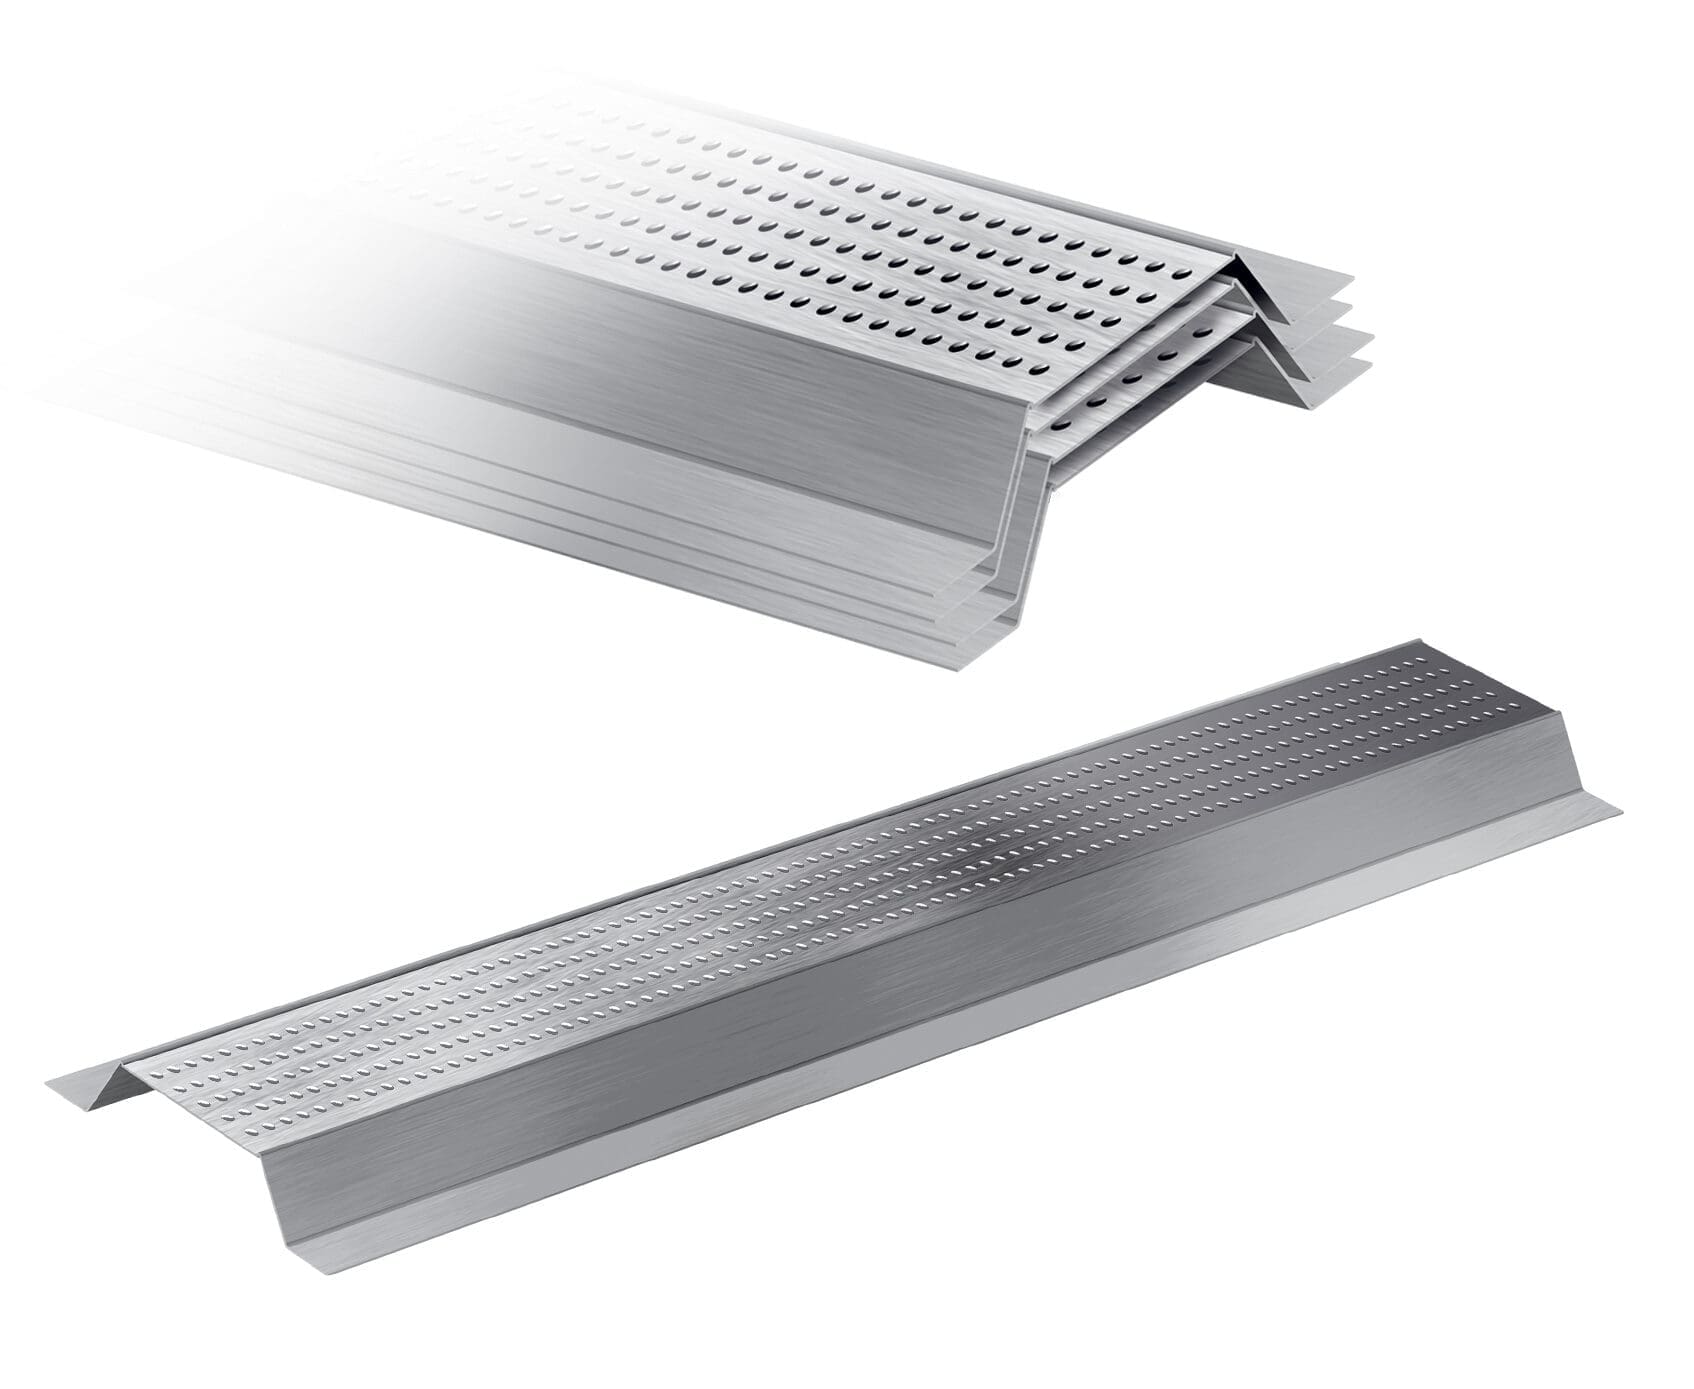
- Size 35mm wide x 28mm deep x 138mm long
- AcoustiClip weight: Approx. 0.47kg/lm
- AcoustiClip composition: Roll-formed galvanised steel to BS EN 10346:2009. Continuously hot-dip coated steel flat products
- Weight capacity: Up to 50kg/m2, depending on clip and channel spacing
- Dual rubber fixing points ensure a more secure fixing
- Dual rubber acts as a shock absorber to reduce vibration
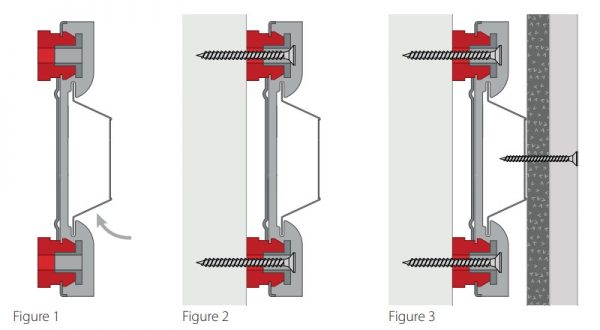
Figure 1: Attach the channel to the clip by either pinching the metal channel into the clip or sliding the clips onto the channel before fitting the clips.
Figure 2: The AcoustiClip is fixed in place using a standard screw 55mm minimum length. If you are fitting to a surface that requires drilling, use standard brown wall plugs and screws.
Figure 3: Attach the boards to the AcoustiChannel with drywall screws. The screw should go into the AcoustiChannel by a minimum of 10mm.
To extend the length of the AcoustiChannels, overlap them by approximately 100mm and screw them together. Avoid overlapping the channels on a clip.
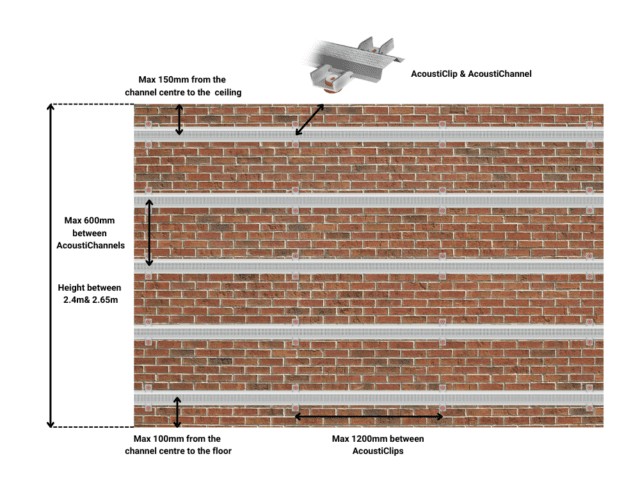
Wall Spacing
- Maximum 600mm vertically
- Maximum 1200mm vertically along the AcoustiChannel
- Maximum 150mm from the ceiling to the channel centre
- Maximum 100mm from the floor to the channel centre
- Position a clip at the end of each row
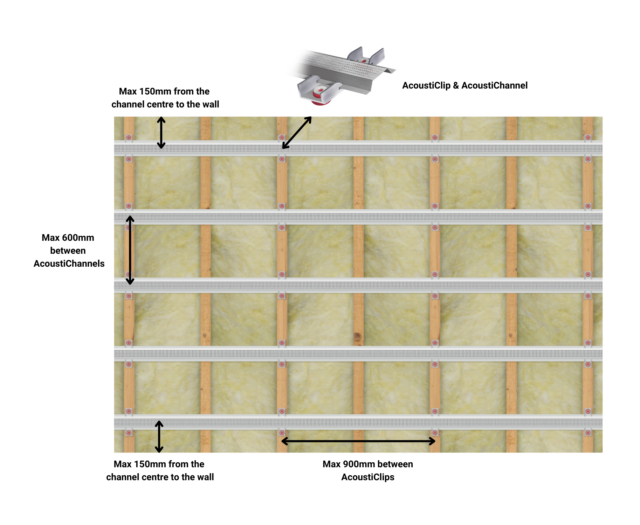
Ceiling Spacing
- Maximum 600mm vertically
- Maximum 900mm vertically along the AcoustiChannel (timber joist ceilings; this is typically every other joist)
- Maximum 150mm from the wall and the channel centre
- Position a clip at the end of each row
Due to the nature of most of the materials we supply, orders are typically delivered on pallets.
All orders will be wrapped, protected, and secured to the pallet to ensure they arrive in the best possible condition. Goods will be delivered as near to the property as possible. The drivers will not be able to carry orders into your property.
Deliveries are made between 8am and 6pm, Monday to Friday.
Once an order has been placed, you will be notified of the expected delivery date. Please ensure someone is available to sign for the delivery.
We charge a flat delivery rate of £60 plus VAT for palletised deliveries. We do not charge per pallet, no matter how many pallets are used to deliver your order.
Orders placed for items weighing less than 20kg will be sent via courier for £20 plus VAT.
We have a high stock level, so we typically deliver orders in approximately three working days.
If you want to speak to us regarding your delivery, please call 01423 339163.
Please check out our full delivery terms for more details.
Ceiling soundproofing systems using AcoustiClips
Got a question?
Send us a message, and we’ll respond as soon as possible. Alternatively, call 01423 339163 to speak with an adviser.