Fitting the AcoustiClip System to Walls

How to fit AcoustiClips to walls
Fitting guide for using the AcoustiClip System – Fitting the AcoustiClip system to walls
This guide will help with fitting the Acousticlip System to walls if you use the following soundproof systems.
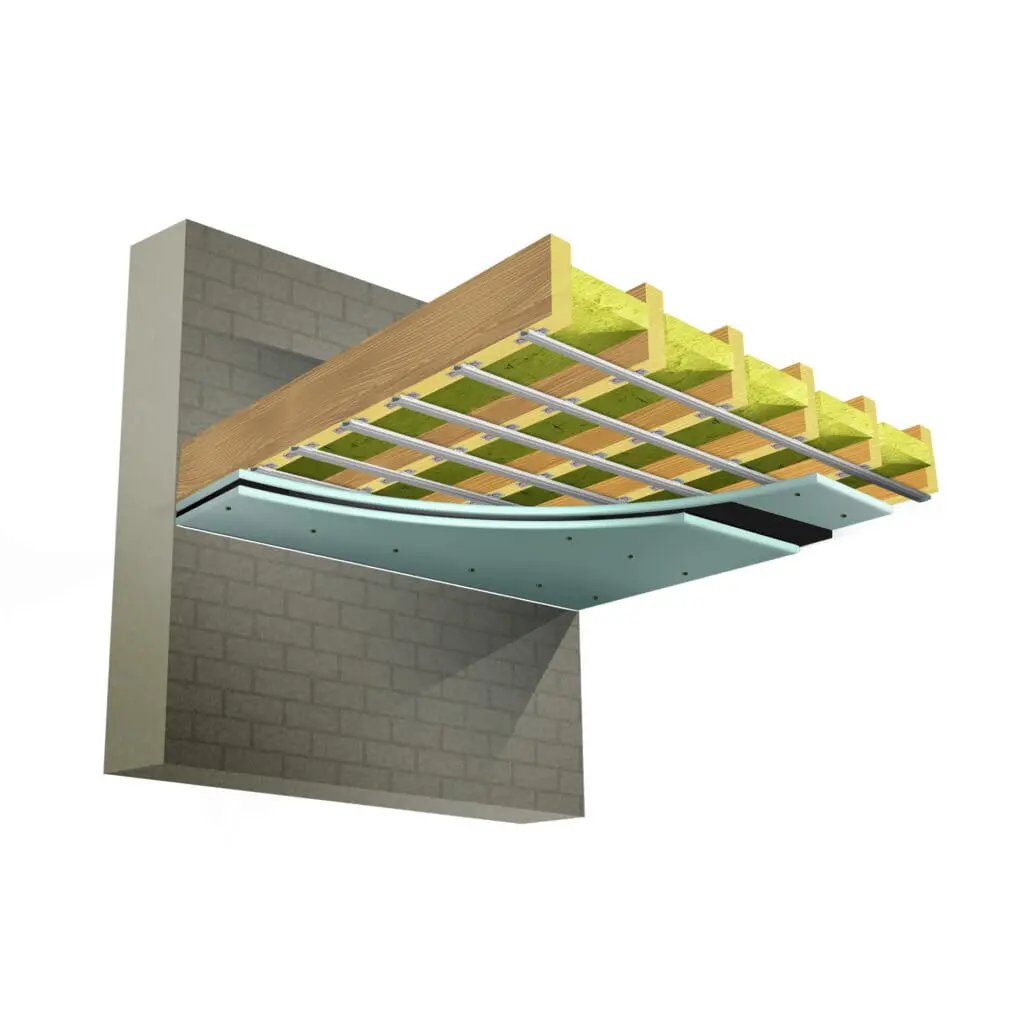
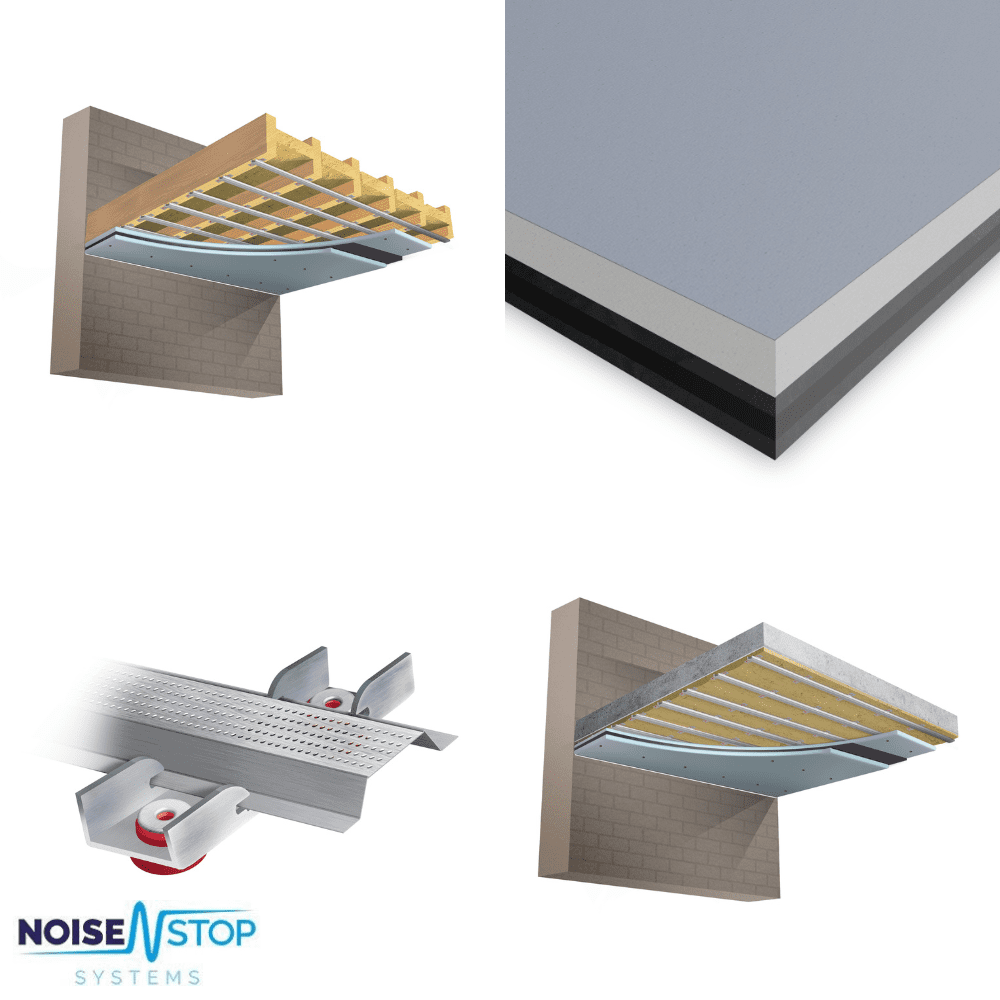
The AcoustiClip and AcoustiChannel are high-performing solutions designed to decouple walls and ceilings. Install the system directly to solid walls, stud frames, timber joists and concrete ceilings to significantly reduce sound transmission.
Fitting the AcoustiClip System to walls
- The spacing of the AcoustiClips along the AcoustiChannel is up to 1200mm.
- The maximum spacing between the AcoustiChannel is 600mm.
- The AcoustiClips can either be fixed to the wall before inserting the AcoustiChannel or inserted onto the AcoustiChannel before fixing to the wall.
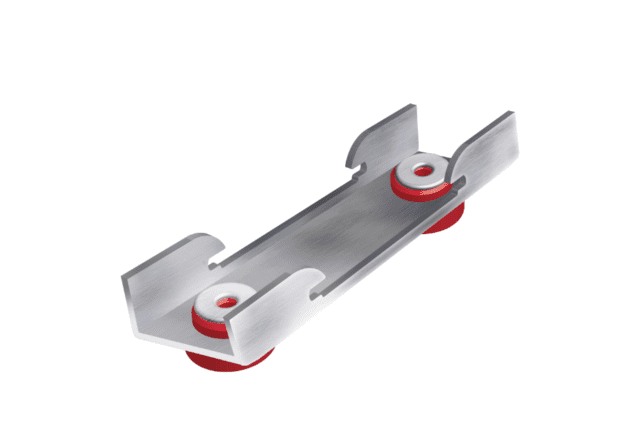
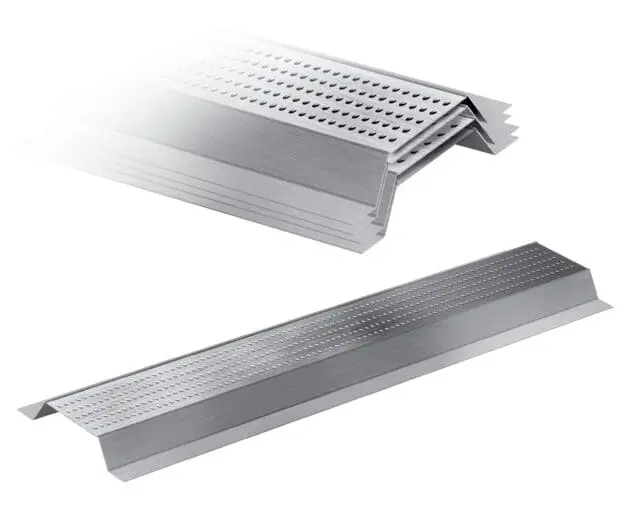
- The AcoustiChannel is easily fastened to the AcoustiClip by pinching the channel’s bridge and sliding the clips into place. (Figure 1)
- Fix the AcoustiClips to the wall using suitable screws for the background on which the clips are being applied. Use a screw at least 60mm long to secure. Take care not to crush the rubber impact inserts by over-torquing the screws. Use a mid-range setting on electrical drivers. (Figure 2)
- Overlap the AcoustiChannel by 100mm to join the AcoustiChannel lengths.
- Attach plasterboards to the Acoustichannel using drywall screws or suitable self-tapping screws for metal stud frames. (Figure 3)
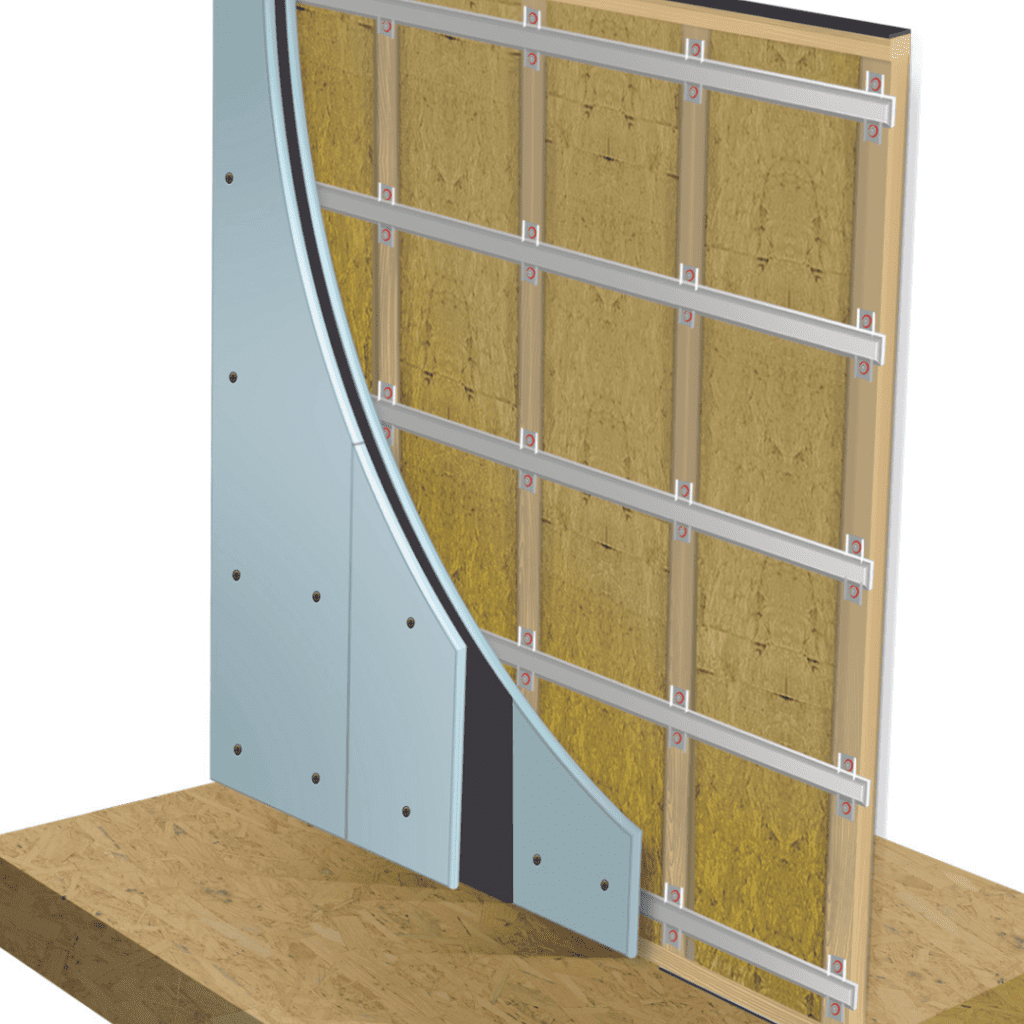
Attaching AcoustiClip and AcoustiChannel to the wall

Fitting the AcoustiClip System to walls
- Ensure any stud frame is filled with acoustic insulation when installing the stud wall system. If you are installing a new stud frame, you can isolate it from the room using the isolation strips around the perimeter of the wall (not supplied with the system). For the direct-to-wall solution, apply the acoustic insulation between the AcoustiChannel and the wall.
- Install the acoustic plasterboard sheets by screwing them into the Acoustichannel. Use drywall screws or other suitable screws for self-drilling into a metal frame system, with at least 10-15mm longer than the combined depth of the boarding.
- Increase the length of the screw for the second layer of boarding to account for the depth.
- When fitting the plasterboard sheets, ensure packers are used along the floor to isolate them from the floor; these can be left in place.
- Apply a bead of acoustic sealant along the edge of each panel as they are fitted. Leave a 2-3mm gap around the wall’s perimeter between the existing wall and ceiling; once the installation is complete, fill the gap with the acoustic sealant.
- Complete the installation by skimming the wall or filling the tapered edge of the plasterboard before decorating.
- Use acoustic putty pads inside any reinstated electrical outlets.
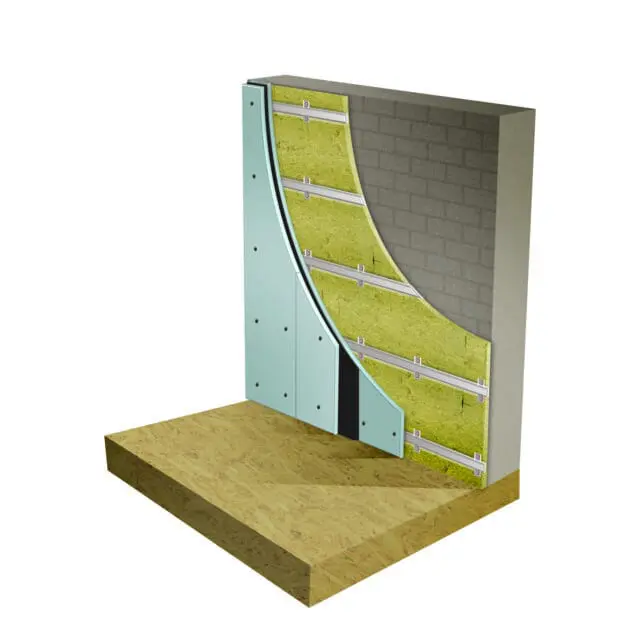
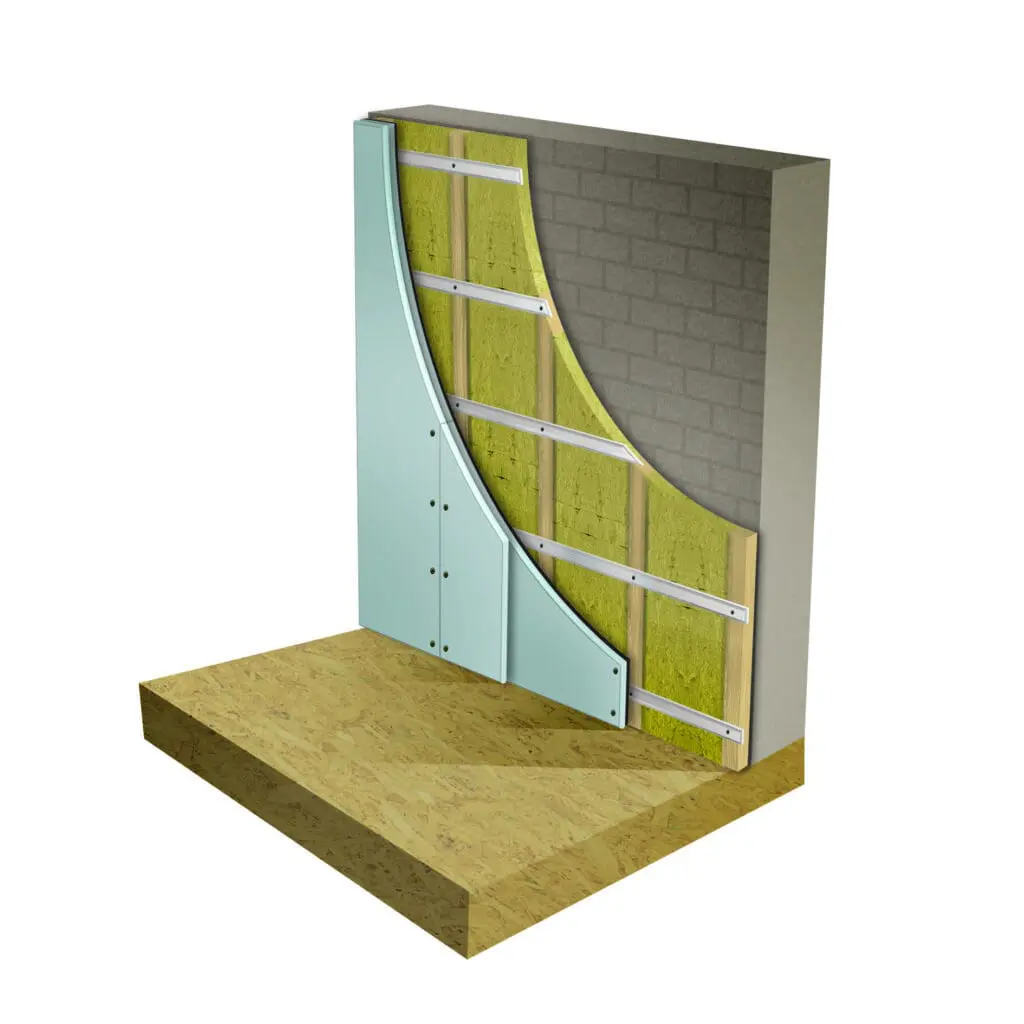
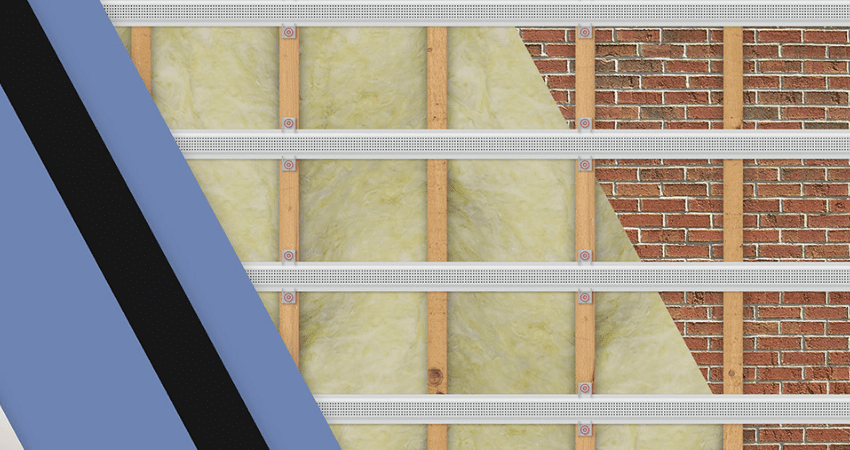
AcoustiClip Direct to Wall System

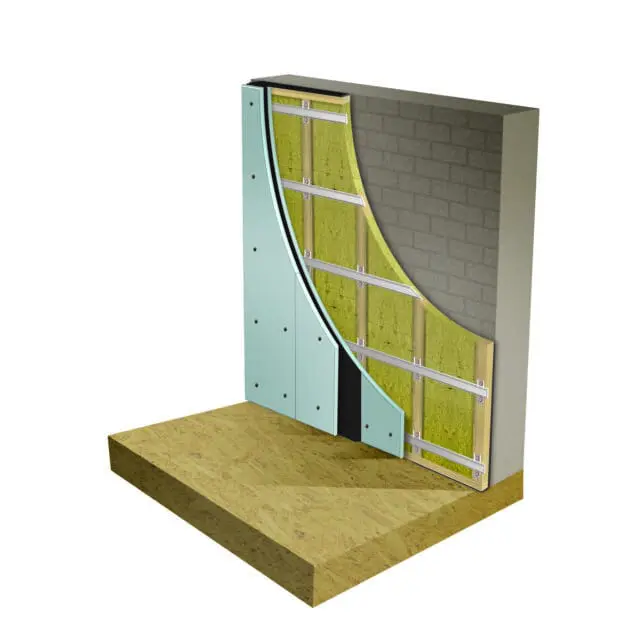
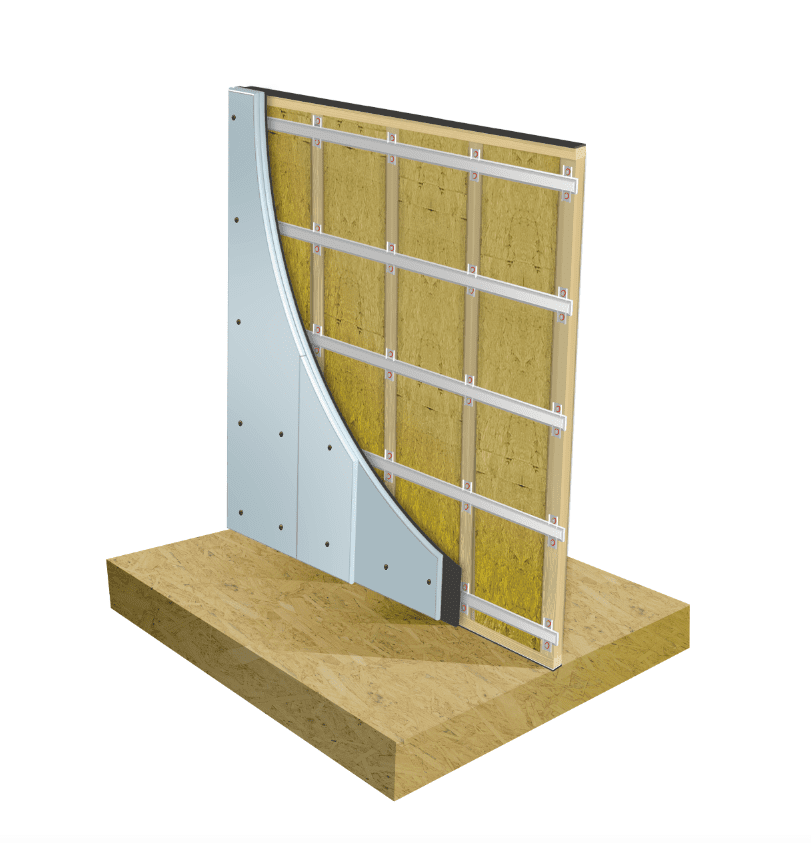
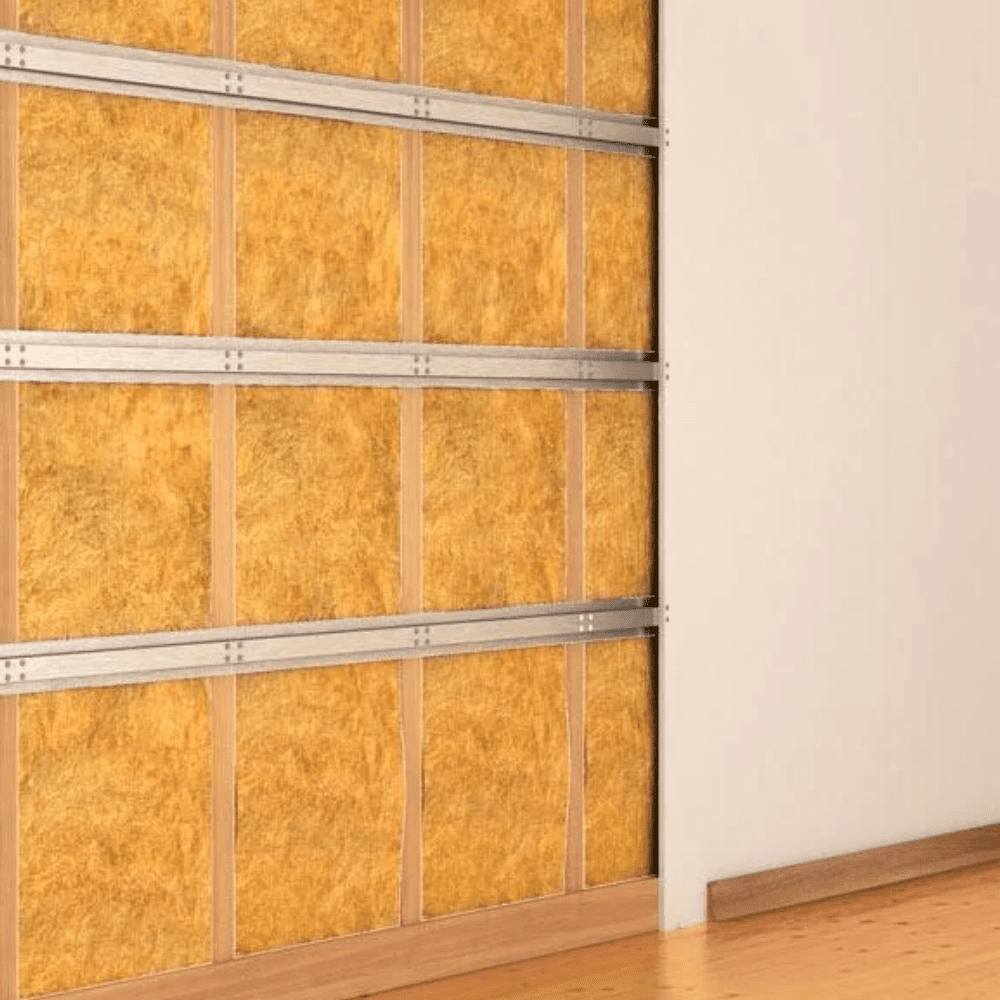
AcoustiClip Stud Wall System

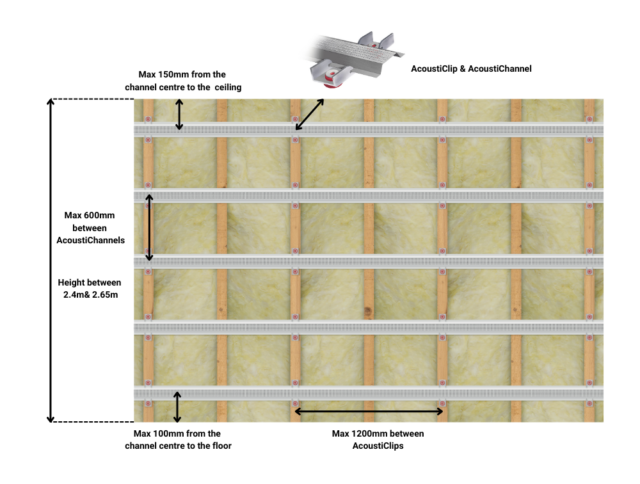
AcoustiClip and AcoustiChannel spacing for walls
- AcoustiClips spaced at 600mm centres for walls and ceilings.
- When fitting to walls, a 150mm gap can be left between the AcoustiChannel and the ceiling.
- When fitting to ceilings, a 150mm gap can be left between the AcoustiChannel and the walls.

- AcoustiClips are fitted at each end of the AcoustiChannel, with a maximum spacing of 1200mm between clips.
- A maximum gap of 75mm can be left at the bottom of the wall from floor to channel, and a maximum gap of 150mm can be left at the top of the wall to the channel.
AcoustiClip Fitting Summary
- AcoustiClips can be fitted directly onto solid brick, concrete, and stud walls.
- AcoustiClips are fitted vertically to the wall at a maximum centre-to-centre of 600mm, and horizontally at a maximum centre-to-centre of 1200mm. Install a clip at each end of the wall.
- A maximum gap of 75mm can be left from the floor to the centre of the first AcoustiChannel. A maximum gap of 150mm can be left between the ceiling and the top row of AcoustiChannel.
- When installing the system onto a stud frame, ensure the cavity is filled with the acoustic insulation supplied with the system.
- The acoustic insulation supplied with the Direct to Wall System is applied to the wall between the AcoustiChannel.
- When installing the first row of boards, place them on thin packers 2-3mm so they do not sit directly on the floor. Once the installation is complete, the acoustic sealant fills this gap.
- The soundproof panels are attached to the AcoustiChannel using drywall screws or self-tapping screws.
- Apply a bead of silicone between each board to ensure a complete acoustic seal.
- A gap of 2-3mm should be left around the wall’s perimeter, ensuring no part of the new wall touches the existing wall and ceiling. Use the acoustic sealant around the wall’s perimeter to fill the gap.
- To finish the wall, it can be plastered, or you can fill the tapered edge of the plasterboards before decoration.
- When reinstating electrical sockets, use Acoustic Putty Pads inside the back boxes to retain acoustic integrity.
Related Products
AcoustiClip Party Wall Kit - Direct to Wall
£316.32 exc VAT.
AcoustiClip Solid Wall System - Independent Wall Kit
£310.56 exc VAT.

AcoustiClip Stud Wall System - Stud Wall Kit
£310.56 exc VAT.
AcoustiClip | Sound Isolation Clip
£4.95 exc VAT.
AcoustiChannel 1800mm Metal Furring Channel
£4.45 exc VAT.
Wall Soundproofing
Make sure you are getting the right soundproofing for your needs. Understanding the most common types of noise and how to stop them will help you decide the right solution.
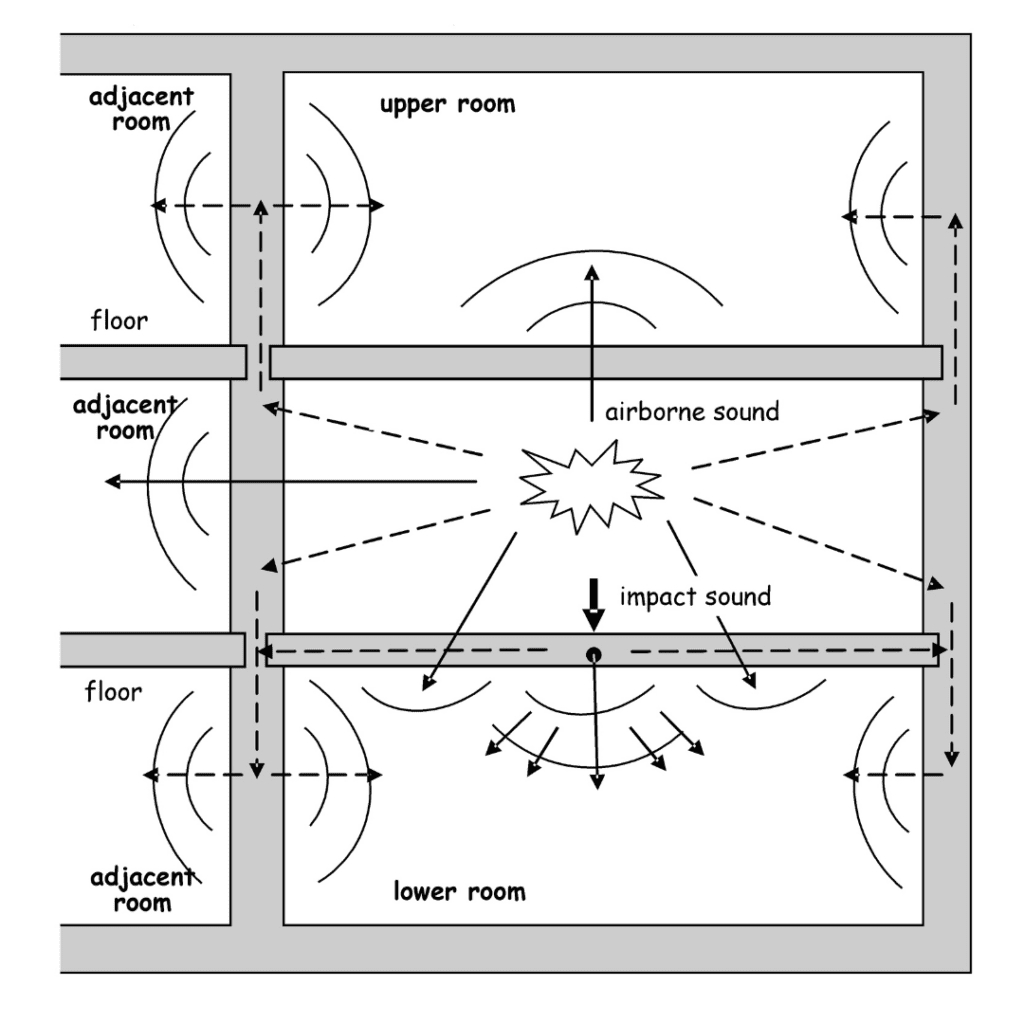
Different Types of Sound
- Airborne sounds – Conversation, TV noise and radios are examples of airborne sound. The best way to stop airborne sounds is to add mass/density to the walls or ceilings.
- Impact/vibration sounds – Footfall and moving furniture across a floor are examples of impact sounds. The best way to reduce these sounds is to create separation.
In summary, the best way to reduce airborne sound is to increase the mass of the area you want to soundproof. Reducing the impact/vibration sounds is achieved by creating separation within the structure.
Reducing Impact and Airborne Sounds
By following these steps, you will ensure you achieve the best level of soundproofing for your room.
- Mass/Density – Increasing the mass and density of the area you are soundproofing will block airborne sound transfer between rooms. You will increase the mass of walls and ceilings using materials such as soundproof panels or high-density acoustic insulation slabs.
- Separation – Incorporating separation within the structure will reduce vibration and the transfer of impact sounds between rooms. Achieve separation by building independent stud walls and ceilings. If you don’t have the space in the room, you can use acoustic clips and resilient channels to decouple the wall and ceiling.
- Absorption – Use materials that are going to absorb sounds. Acoustic insulation is suitable for sound absorption because it converts sound waves into heat as they pass through the insulation. Dense mass-loaded barriers will also dampen and absorb sound.
Soundproofing posts
Categories
50 articles
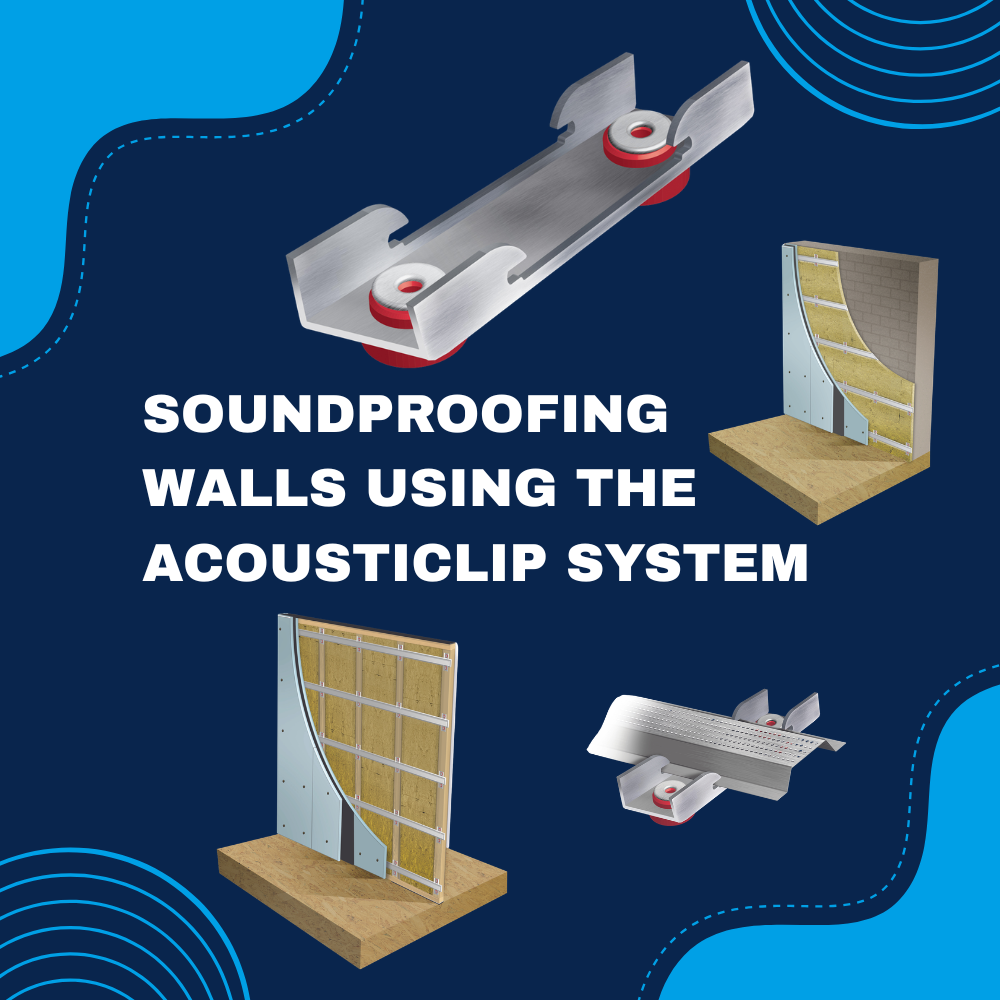
Soundproofing Walls Using The AcoustiClip System
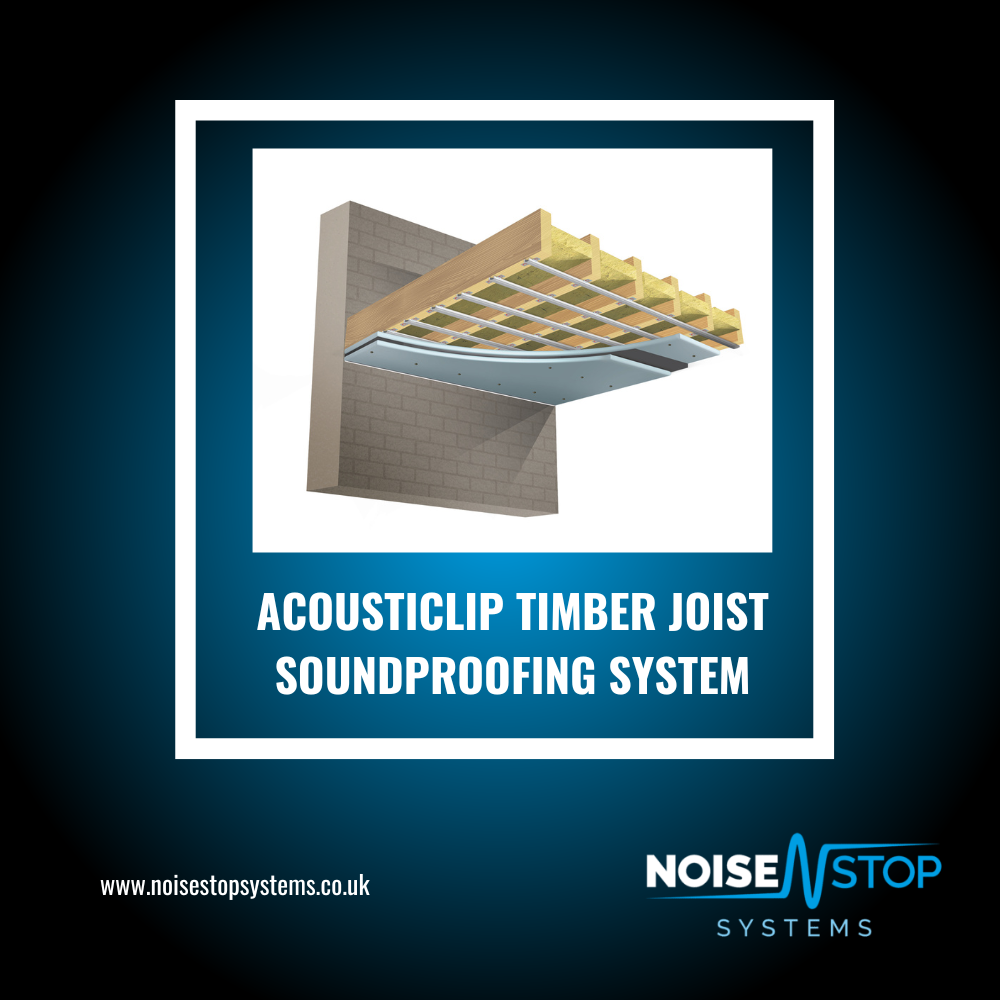
Soundproofing Ceilings with the AcoustiClip Timber Ceiling System
Soundproofing Walls FAQs

Soundproofing Ceilings FAQs
Top 3 Recommended Solutions for Soundproofing Walls

How To Soundproof Floors
Soundproofing Floors FAQs

How to Soundproof a Party Wall
How to Soundproof a Ceiling
How To Soundproof Walls
How To Soundproof a Stud Wall

Best Way to Sound Insulate a Wall

Best Sound Insulation For Walls

How to Soundproof a Room for a Home Cinema
Meeting Part E Building Regulations When Converting a Property into Separate Dwellings
What is the difference between airborne and impact noise?
What are the Best Soundproof Underlays?
Wall Sound Insulation

Best Soundproofing Products 2025
Soundproofing Materials for Walls
Understanding Sound Insulation

Guide To Soundproofing Your Home
Soundproofing Materials for Ceilings